This tutorial will guide you through the process of making your buttons work for you by linking to other frames within your flash document.
Note: This tutorial assmues you can make basic flash buttons. If you would first like to learn
or review how to do this, see our Create Buttons
Tutorial. This tutorial assumes you have a basic understanding of the common tools of Macromedia
Flash and therefore will supply only an abbreviated procedure directed solely at our purpose.
Since every step will not be show, the entire screen will be shown at each step. Simply click on the smaller
thumbnail version to load the full screen image.

The first step of the process is to create some buttons. Again, this is done quite similarly to the process described in other tutorials. The three buttons above are what we will be working with in this process. Also, three simple animations were created within the document as something for the buttons to lead to. Their creation will not be shown or explained here.

The ActiveScript for your buttons needs to be entered in their Actions menu. Select a button and then click on the blue bar marked "Actions" below the workspace (shortcut key = F9).

Using the script menu (+ above script editor section) the on command was selected. This automatically inserts the on command and any grouping characters that the code calls for. Below we can see the code that was added.


Since we want the button to activate when it is clicked the word "release" is entered between the parentheses after the on command.
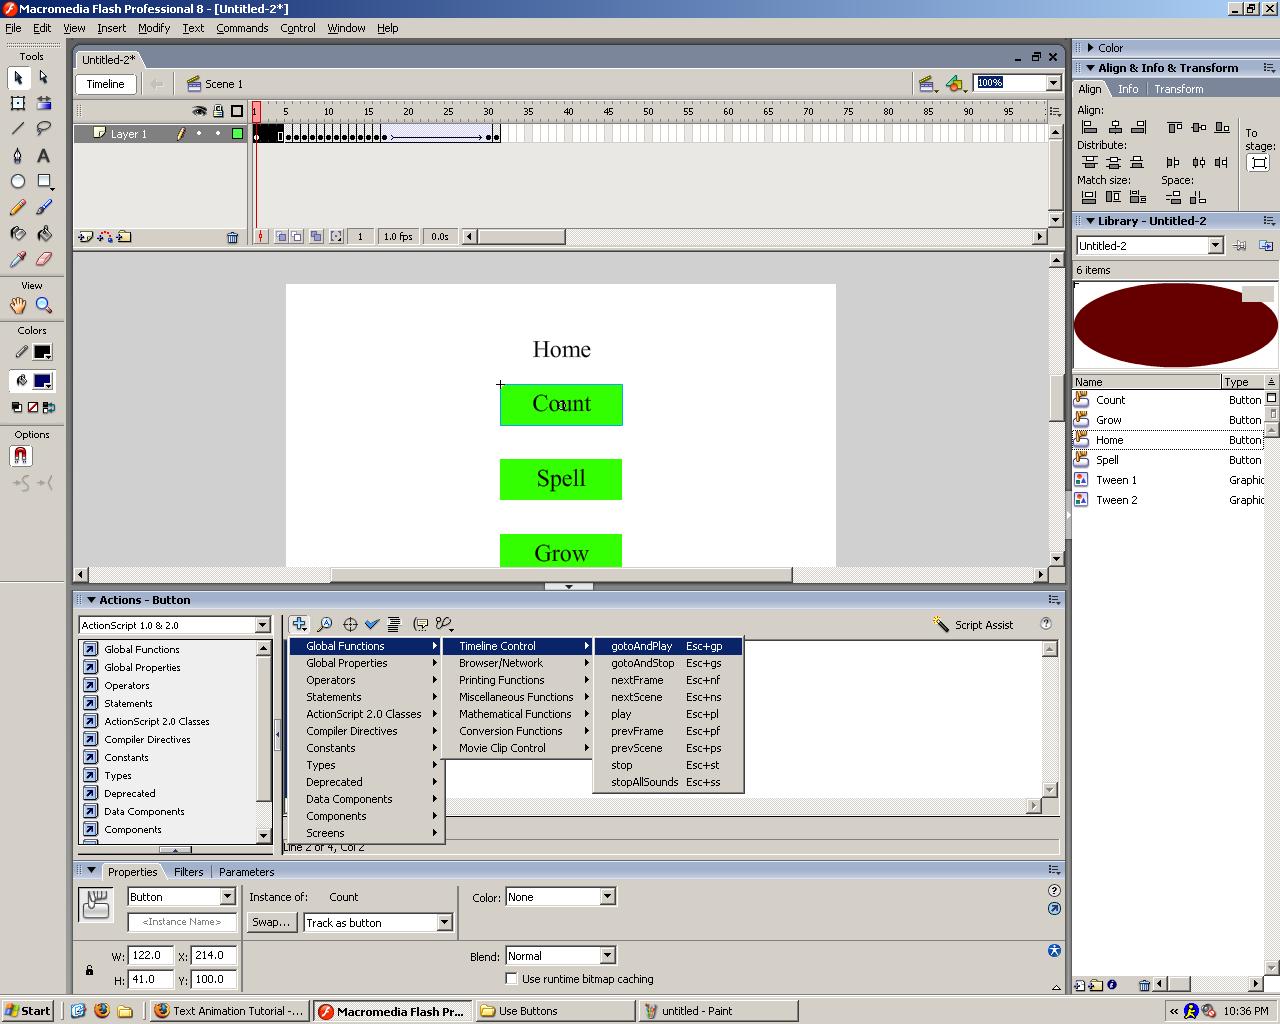
The above picture shows how to use the menu to find the gotoAndPlay( ) command. This command will be attached to the button so that when the button is released ( on(release) ) the animation will jump to the supplied frame and carry out the animation there.


The picture above is showing the same code applied to the second button. This time, when the code is begining to be entered by the user, the autofill option comes on and a list of available scripts is shown.
This process is applied to all three buttons in the first frame ("Home") along with three buttons found at the end of each animation that link back to the first frame. In order for the animation to proceed properly, another command needed to be added. Any frame that has a button on it will need to halt the animation until something is selected. To do this, all frames that contain a button are given the script stop( );. This will pause the animation at this frame and allow the user to select what to do next. **It is important to note that the stop script is given to the entire frame, not just an object inside it. When adding a stop commands, make sure you select (double-click) an empty part of the workspace first.**
View the file created by this tutorial here.